

Understanding High-Key VS Low-Key Lighting
In this post, we will look at two different, yet very popular, lighting techniques: HIGH-KEY and LOW-KEY. High key lighting is just what you would imagine – very bright and even light, whereas low key lighting will emphasize midtones and shadows. Now, lets look at these lighting techniques in more detail:

High-Key Lighting
First, let’s look at High-Key Lighting:
Varying levels of light can be used in high key, ranging from “just bright enough”, to “teetering on the edge of over-exposing your highlights”, which is a completely valid stylistic choice.
High key is also used to separate the subject from the background, which is why a lot of magazine ads feature the product on a white, seamless background. This technique adds impact to the photo and makes sure the main subject is the focus.
So if you want to make your subject stand out, OR give your photos a bright, happy feel, high key lighting is a great place to start.

Having several studio lights, flashes and reflectors is the ideal lighting set-up to achieve an image with even light, no shadows, and no over-exposed highlights. But not all of us have that much equipment available to use.
Here are a few things that you can do, with limited equipment, that will allow you to achieve a high key look:
- Have a room with a lot of even, natural light. Bright windows can work wonders, because the light is diffused, eliminating harsh shadows, which is what you DON’T want with high key.
- If you have a reflector, position the reflector to bounce the light directly on the front of your subject, not on the side. If you have the reflector positioned on the side, you will create shadows, especially on faces.
- Preferably, use a white background. If you don’t have a completely white background, shoot against the lightest color wall or backdrop you can find. White foam board works well, especially if you are doing product photography. Try to stay away from white sheets, unless the sheet is perfectly flat with no wrinkles – even the tiniest wrinkle can make a noticible shadow in your background.
- If you are using a flash, try bouncing the light off the ceiling. Just like the reflector, this will distribute the light more evenly. If you aim the flash directly at your subject, you will end up with shadows on the background.
- Adjust your camera settings to create as much light as possible. For example, use a wide aperture and a slow shutter speed to let more light into your camera.
- Make some finishing touches in post-processing. If you are still seeing some shadows or over-exposed highlights, try adjusting your brightness and exposure to compensate and get the lighting just how you like it.

The secret to achieving good high key lighting is experimentation and practice, and can vary based on your equipment and your shooting environment. The most important thing to keep in mind, though, is to try to AVOID harsh shadows and SEPARATE your subject from the background.
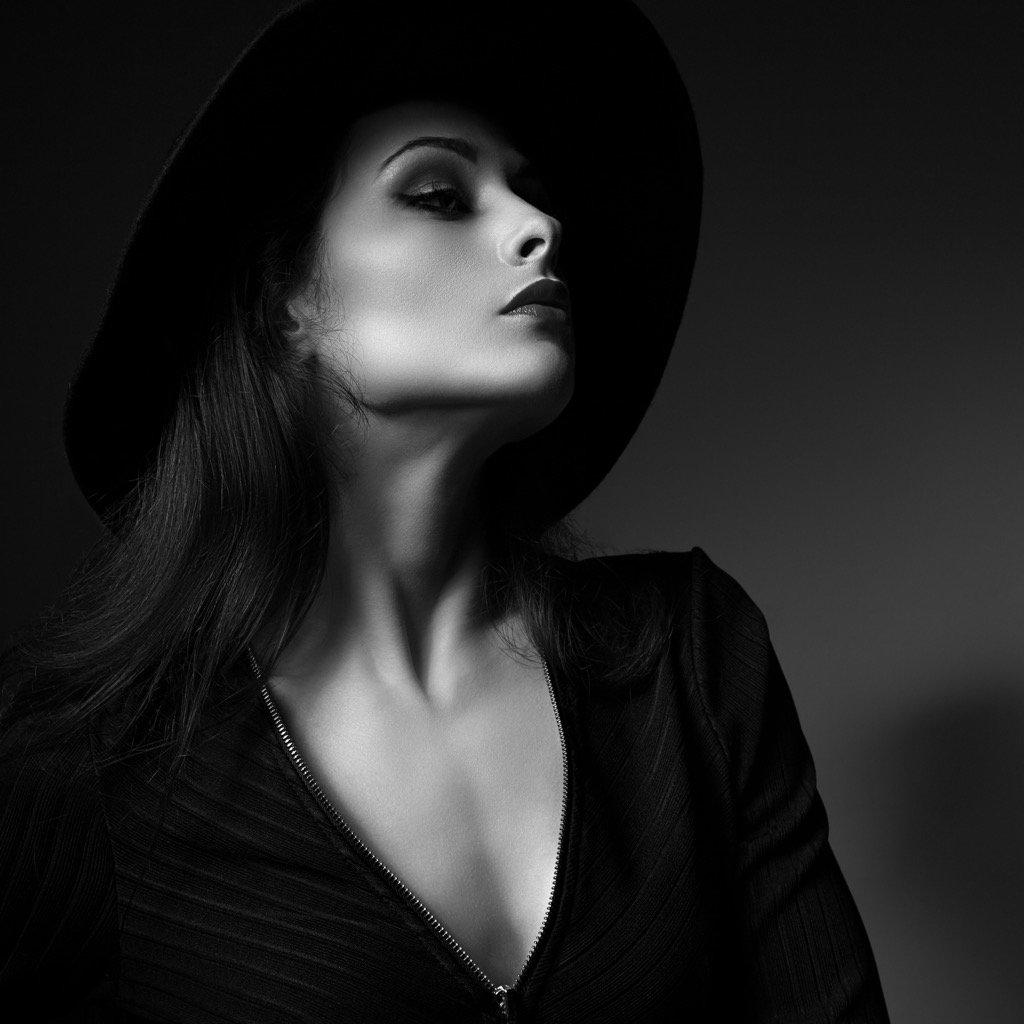
Low-Key Lighting
Now, on to Low Key Lighting:
Low key lighting tends to be a bit more general of a term than high key lighting. Low key photos can range from “slightly darker than a perfect exposure”, to “almost completely black altogether”.
Low key lighting is great for conveying emotion and mood in your photos.
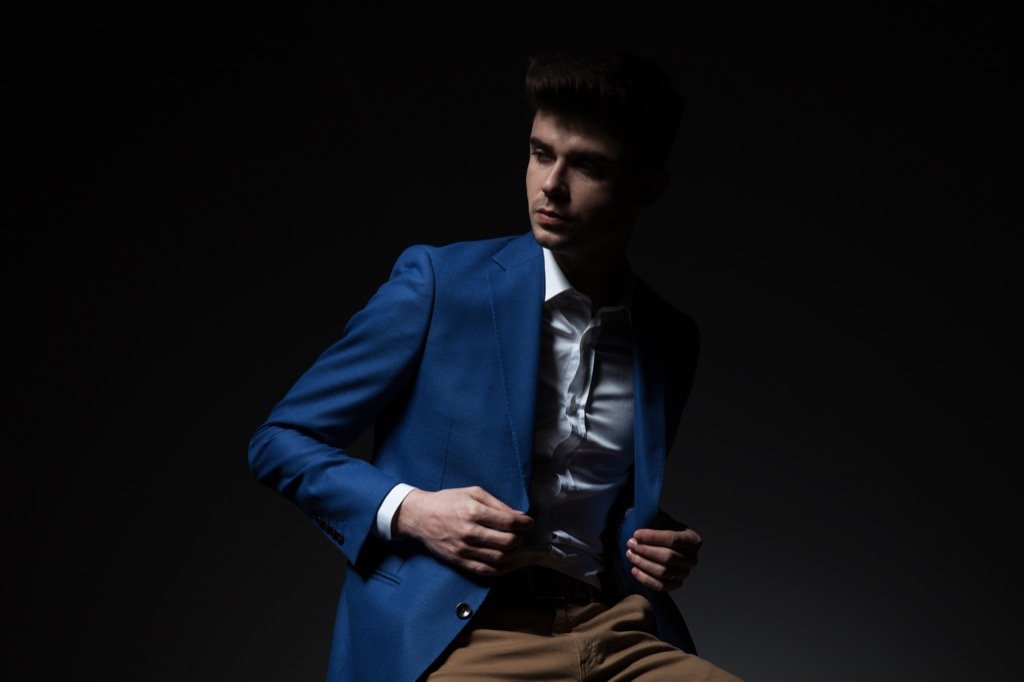
How you choose to expose your highlights and shadows is entirely up to you, though having a wide range of midtones can definitely add more detail and visual interest to your photo. Here are a few things to keep in mind with low key lighting:
- Your tripod is your best friend! You want to keep your ISO as low as possible, to avoid noise, so you will, most likely, have to compensate by using a slow enough shutter speed to capture the details in the midtones. If you are attempting shoot low key holding the camera in your hand, there is a great chance that you will end up with a blurry photo caused by camera shake.
- Make use of currently available light. While a flash can be very helpful, especially if you are shooting on a solid black backdrop, using the available light in your surroundings can also be a great way of creating a completely unique look for your photo.
- Don’t be afraid to experiment! Part of the beauty of low key is that is MOODY, EMOTIONAL, and can TELL A STORY. Play around with letting the light fall directly on your subject, or try placing your subject slightly out of the light (in the shadows). This is your moment to experiment and create something that might be out of your comfort zone.
Conclusion
This is a simple crash-course in high key and low key lighting – THE BASICS. But hopefully it will give you some new ideas and motivate you to try some brand new shooting techniques.
Half the fun of high and low key lighting is experimentation, and the rest is finding what type of lighting suits you, your style, and your vision!
Do you have any questions or comments about High Key or Low Key Lighting? Just leave us a comment below – we would LOVE to hear from you! And PLEASE SHARE this post using the social sharing buttons (we really appreciate it)!