


How to Use Library Filters to Sort, Search & Manage Images in Lightroom
Lightroom is an amazing program, designed to help you manage thousands and thousands of images, as well as quickly edit and process them for web and print.
If you are like me, your Lightroom Catalog has 10,000+ images in it. So how can we quickly find the picture(s) we want, when we want them? Fortunately Adobe built in several different ways for us to organize, sort, and search for our images. Here are the most important tools you should learn to use:
- Keywords – if you aren’t tagging your images with keywords, start NOW!
- Collections – a much smarter and more efficient way to organize your images than by folders.
- Filters – sort, search, and select images via a large variety of choices.
In this article, I want to introduce you to the Library filters.

Using library filters, you can sort and search by:
- File type (like JPG, RAW, DNG)
- Camera model
- Lens model
- Lens focal length
- Aperture, ISO
- Flash state
- Keywords
- Flag status (pick or reject)
- Star rating (between 1 and 5)
- Virtual copies
- Much, much more
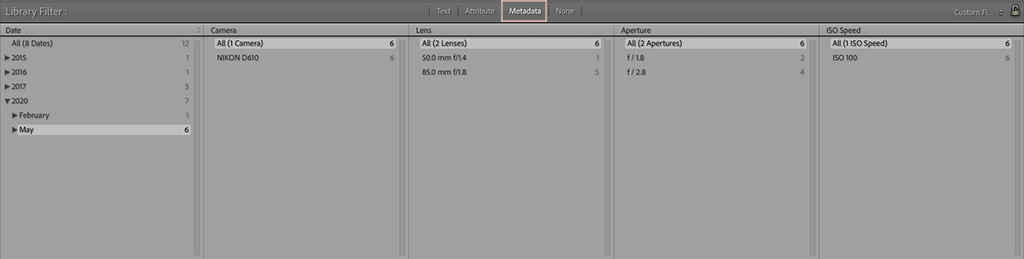
To find filters in Lightroom you need to be in the Library module and seeing the “grid” view, meaning you see multiple images at once not just one (the “loupe” view). At the top of that screen there are four words: Text, Attribute, Metadata, and None. Below is a screenshot of a sort via the Metadata view.
The sky is almost the limit when using library filters to search for images, so I don’t want to overwhelm or confuse those of you who are new to Lightroom by going on and on about EVERY different filter you can use. Instead, I am going to keep it super simple by including a quick, five minute video below.
Along with the short video tutorial, I am also including a FREE DOWNLOAD of a few custom Lightroom filters I made to use myself.
These Lightroom filters will get you started and ONCE YOU UNDERSTAND THEM, YOU CAN MAKE YOUR OWN FILTERS for the things you often search for, or sort into groups.
How to Use Lightroom Library Filters – Video Tutorial
Click Here for FREE Lightroom Library Filters
How to Install Library Filter Presets
Once you’ve downloaded the Library Filter Presets, follow these instructions to get them installed and ready for use:
- Unzip the Filter Presets download.
- Select the .lrtemplate files in the download, and press ctrl/cmd+c to copy the files.
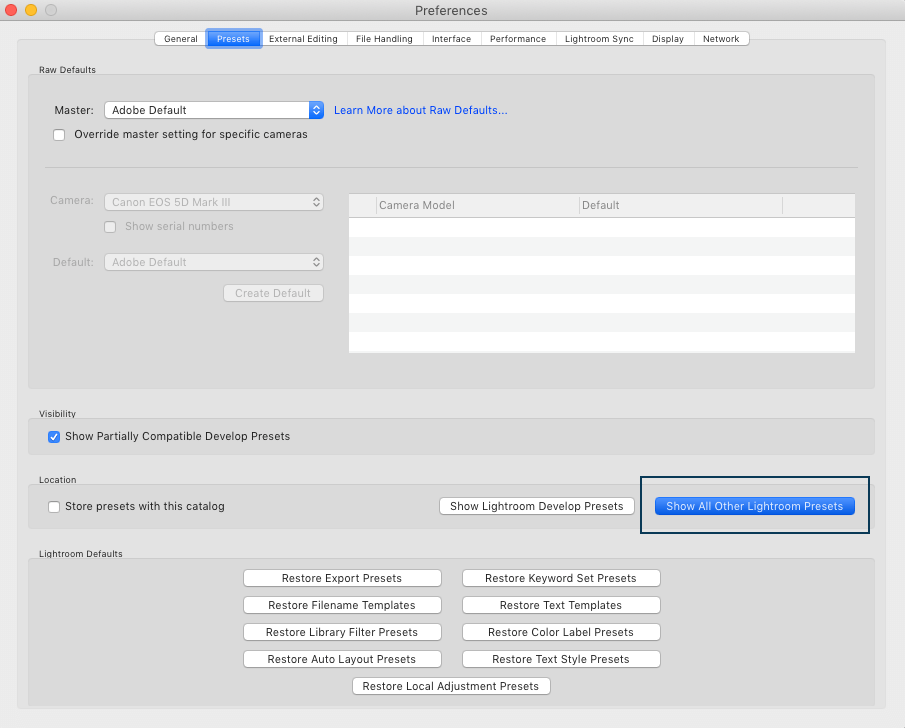
- Open Lightroom and go to Lightroom>Preferences (on a Mac) and Edit>Preferences (on a PC).
- In the menu that opens, highlight the Presets tab and then click on the “Show All Other Lightroom Presets” button.
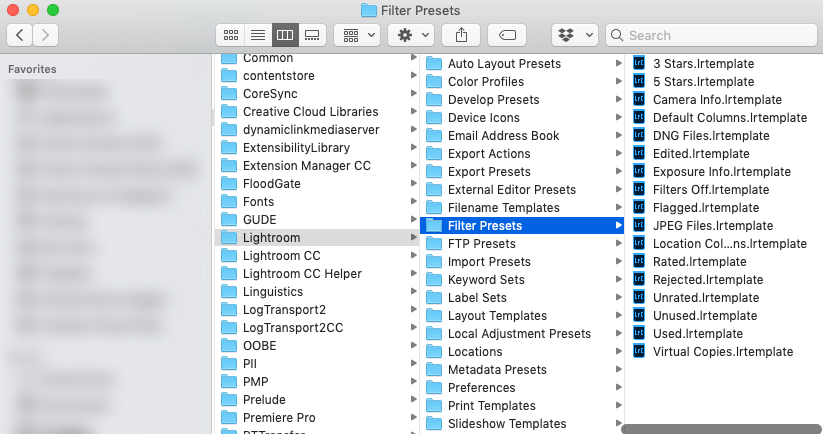
- Double-click on the “Lightroom” folder that is highlighted and open the “Filter Presets” folder. Press ctrl/cmd+v to paste the presets into this folder.
- Close Lightroom and then restart it. The presets will appear as above AFTER you restart Lightroom.
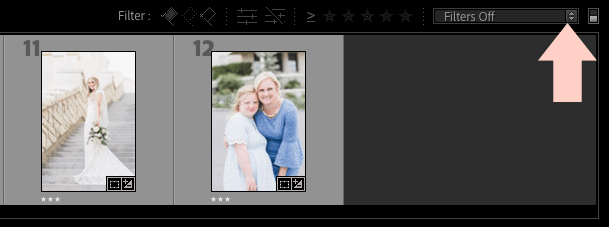
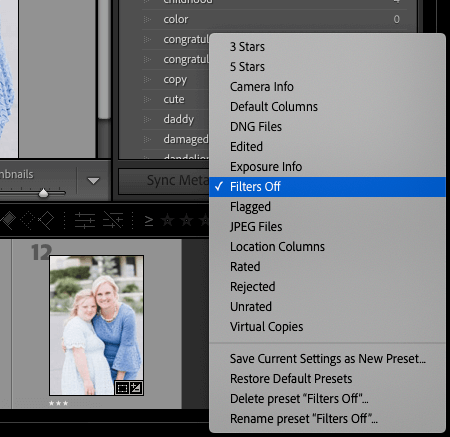
Once the filters are installed, you will find them in the bottom, right-hand of your screen. Click on the option and a menu will open up/down to show you the filters. Clicking on them will sort the images in the collection or folder you have open by the filter you select.
Do you have any questions or comments about How to Use Library Filters in Lightroom? Just leave us a comment below – we would LOVE to hear from you! And PLEASE SHARE this post using the social sharing buttons (we really appreciate it)!