
What is Lightroom Sync?
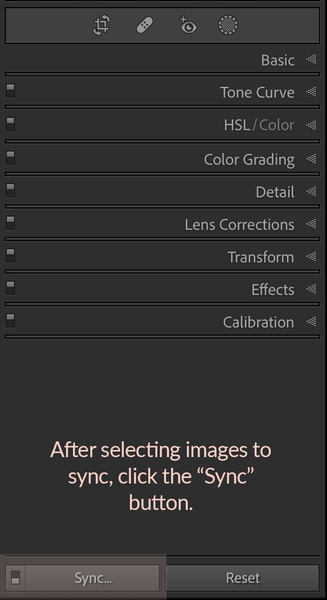
Once you have edited an image and made it the best it can be, you may want to apply those same changes or presets to other images from the same photoshoot or batch. The easiest way to do this is by using the Lightroom “Sync” option that is found at the bottom of the Develop panel.
If you do not know how to sync your photos with each other, this will CHANGE YOUR LIFE! And I’m not exaggerating one bit.
When you “sync,” you are copying one, two, three, or all settings from the “anchor” image onto the other images you have selected. If you edit via presets, which is how I edit 80% of the time, you can also sync those changes as well.
The sync features is exclusive to Lightroom Classic. However, there are some ways to copy edit settings in Lightroom. You can learn how to batch edit in Lightroom here.
How Do You Sync Photos in Lightroom?
- Make any necessary changes to your image like exposure, white balance, shadows, etc. after applying a preset.
- Highlight the other images you want to apply the changes and/or preset to by holding down your SHIFT key and then clicking on the last image in the group.
- If not in a group, hold down your CONTROL key and click the images you want to sync.
- Click the Sync button, which is found on the lower right-hand side of the screen, at the bottom of the Edit Panels.
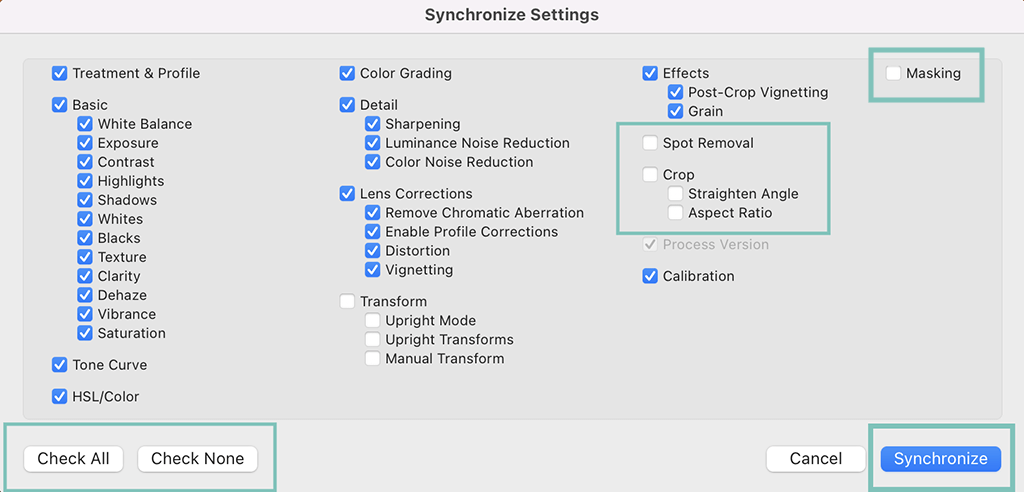
- If you DO NOT WISH TO SYNC ALL THE CHANGES, simply press the “Check None” button to de-select all available choices and then click on the individual boxes for the changes you DO WANT TO BE SYNCED and then press Synchronize.


What NOT to Sync in Lightroom
Never sync adjustment brushes or spot healing – even if the images seem very close. If they are just a little off, the edits won’t line up properly and the synced images could end up looking very strange.

If you are more of a visual learner or would just like to see these steps in action, watch our short Lightroom Sync video below. Learning how to use the Lightroom sync function will literally SAVE HOURS of editing time.

