
If you’ve ever found yourself needing to know how to add a smile to a model in Photoshop (or how to make someone frown in Photoshop), the good news is it is a rather easy process with only a few steps. In this tutorial, we’ll show you how to make someone smile with Photoshop’s Liquify filter, and then we’ll give you some tips on how to make your final result as realistic as possible.
[form name=”get-tips” text=”Receive free ecommerce & product photography tips” align=”right”]
In this article:
- How to add a smile in Photoshop
- How to fix a crooked smile
- How to add teeth to a smile
How to add a smile in Photoshop
- Duplicate the layer
- Open the Liquify Filter
- Adjust the smile
- Adjust other features
- Add the details
Step 1: Duplicate the layer
The way we will be adjusting the image will be destructive, so you will want to duplicate the layer of your image containing the model (most likely your background layer). To do so, select Duplicate Layer from the Layer Panel menu. Rename the layer “Smiling Face.”
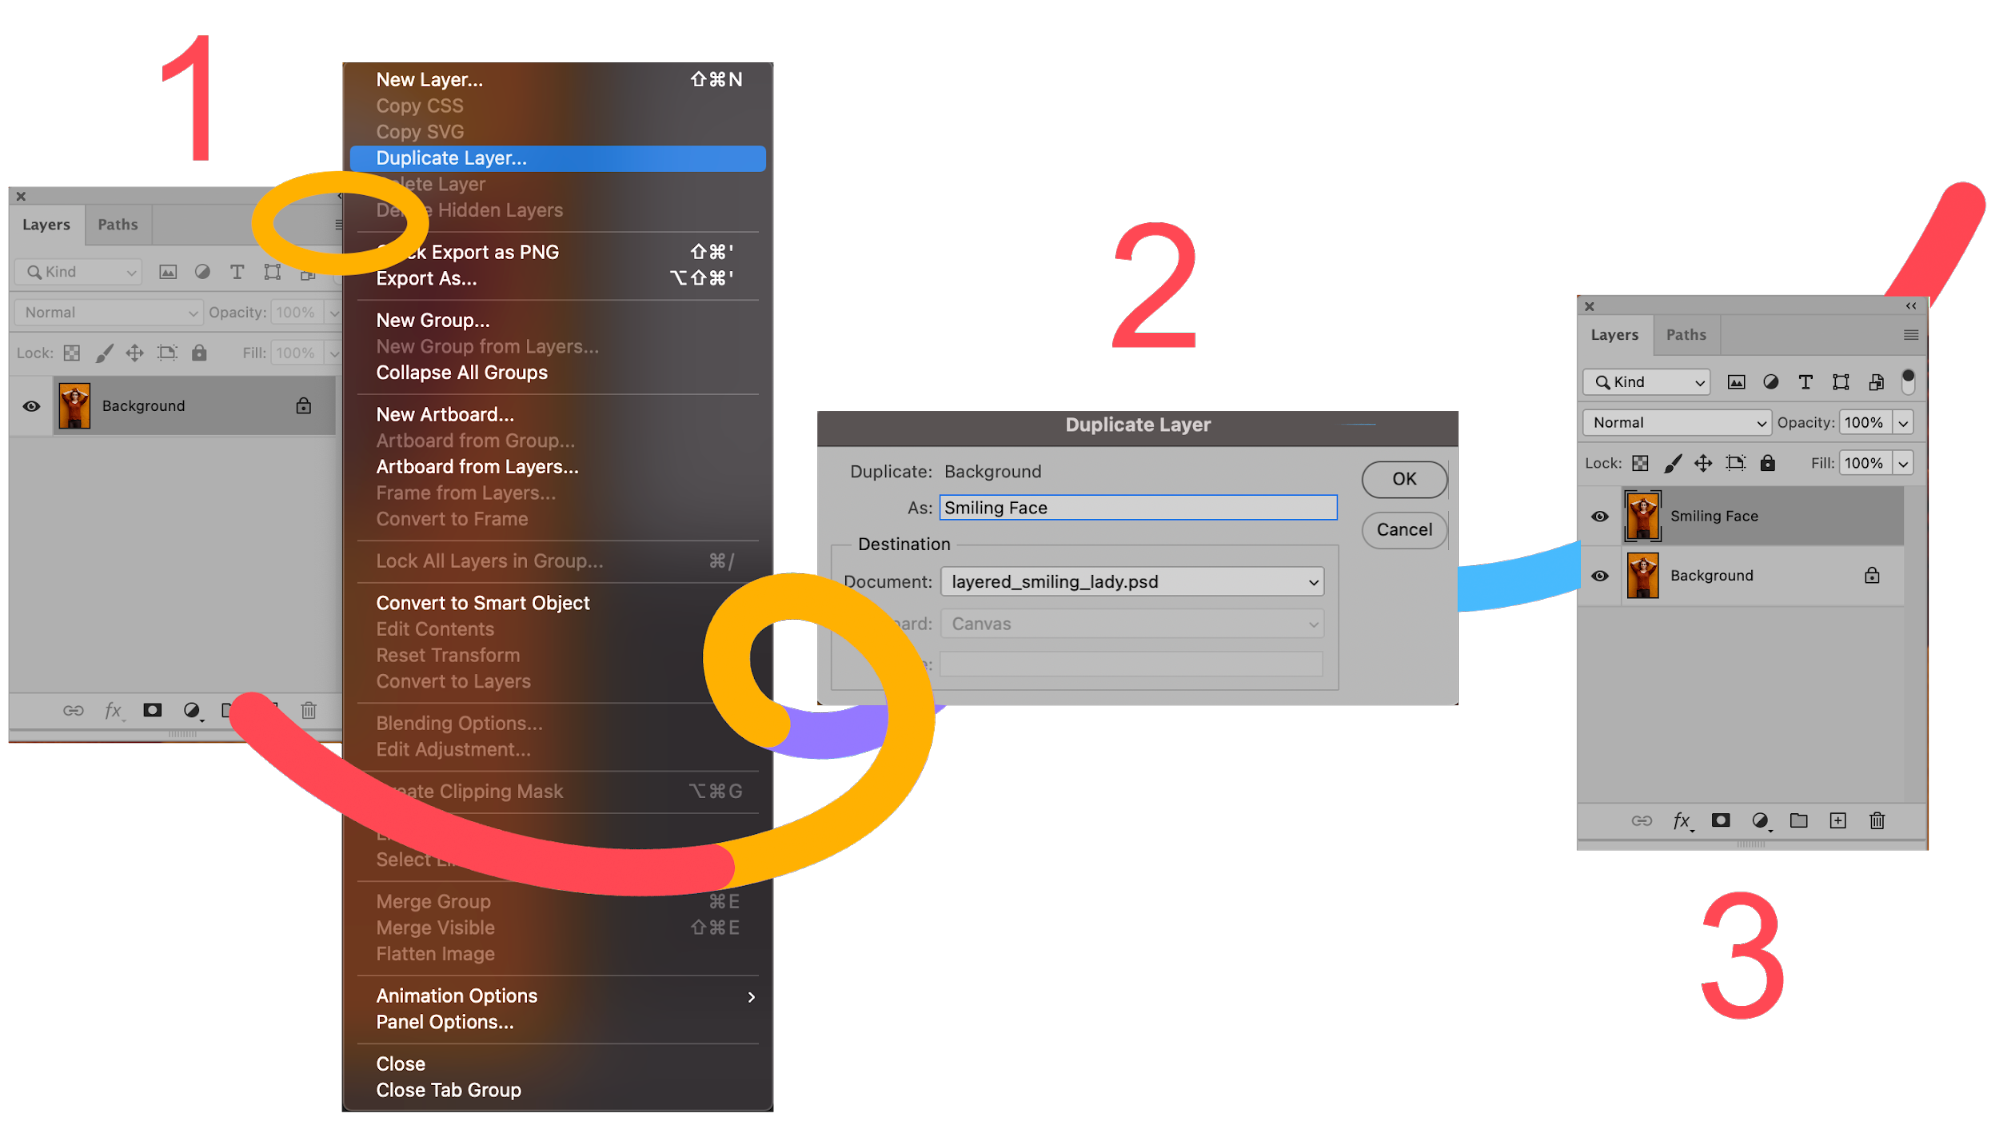
Note: I prefer working destructively when I make edits such as this so that I can layer Liquify effects. If this makes you nervous and you’d prefer working non-destructively, you can convert the layer to a Smart Object before proceeding.
Step 2: Open the Liquify Filter
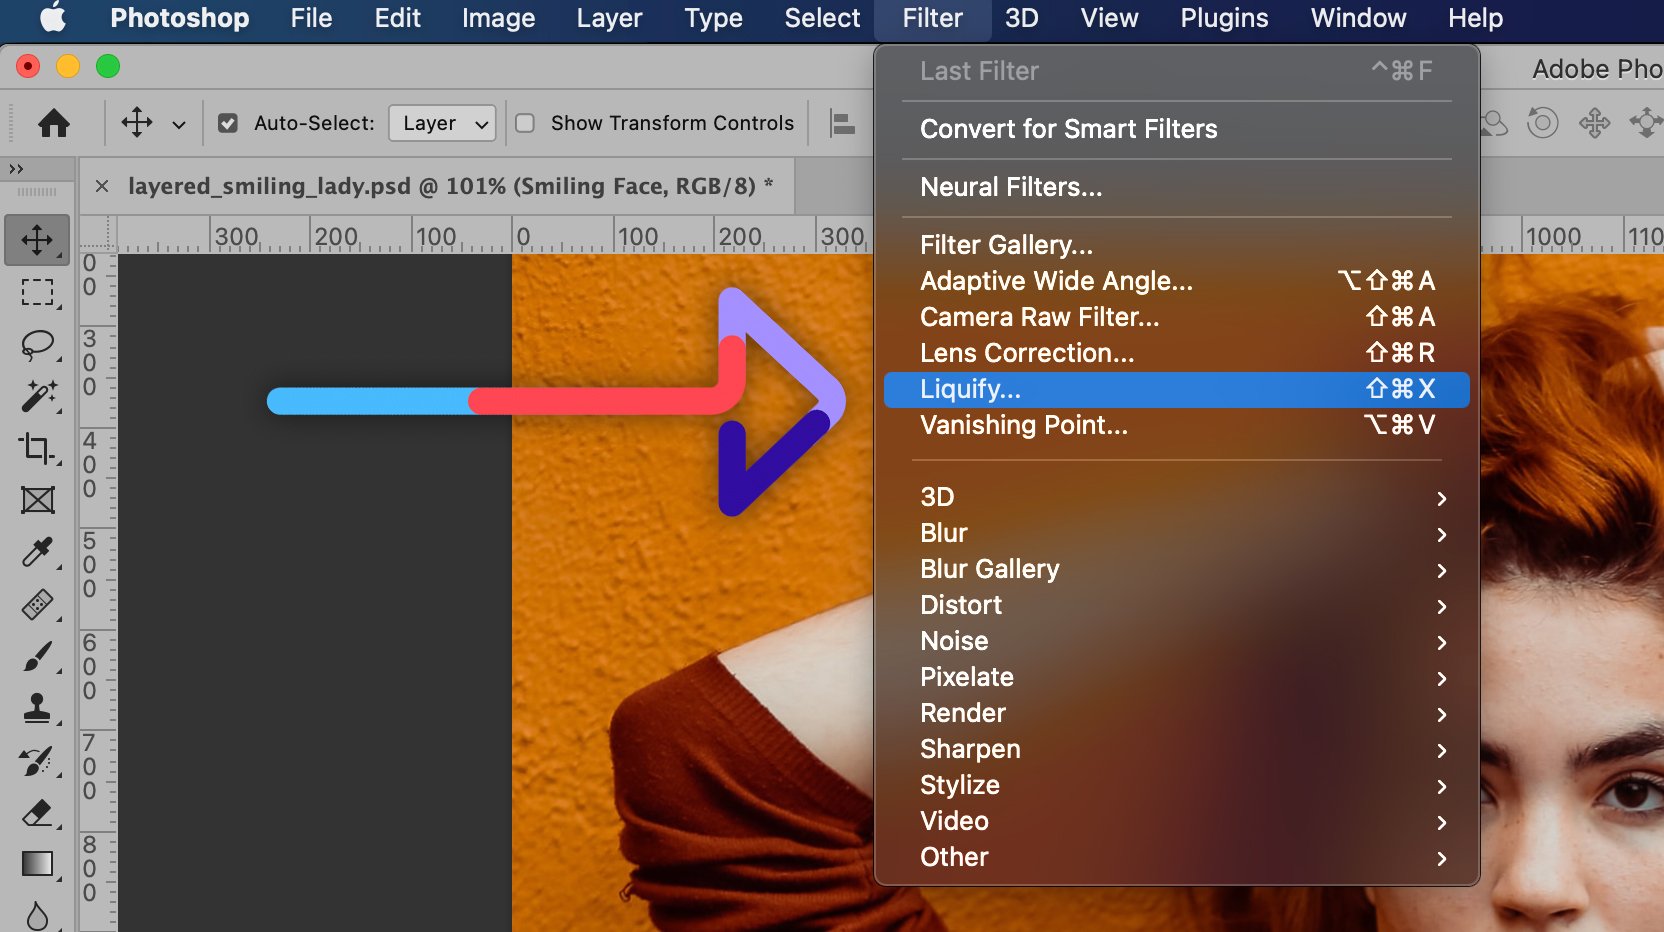
We’ll be using the Liquify Filter to add a smile to our model. With your new “Smiling Face” layer selected, choose Filter > Liquify from the dropdown menu at the top of the application window, or type SHIFT+CTRL+X (SHIFT+COMMAND+X on a Mac).
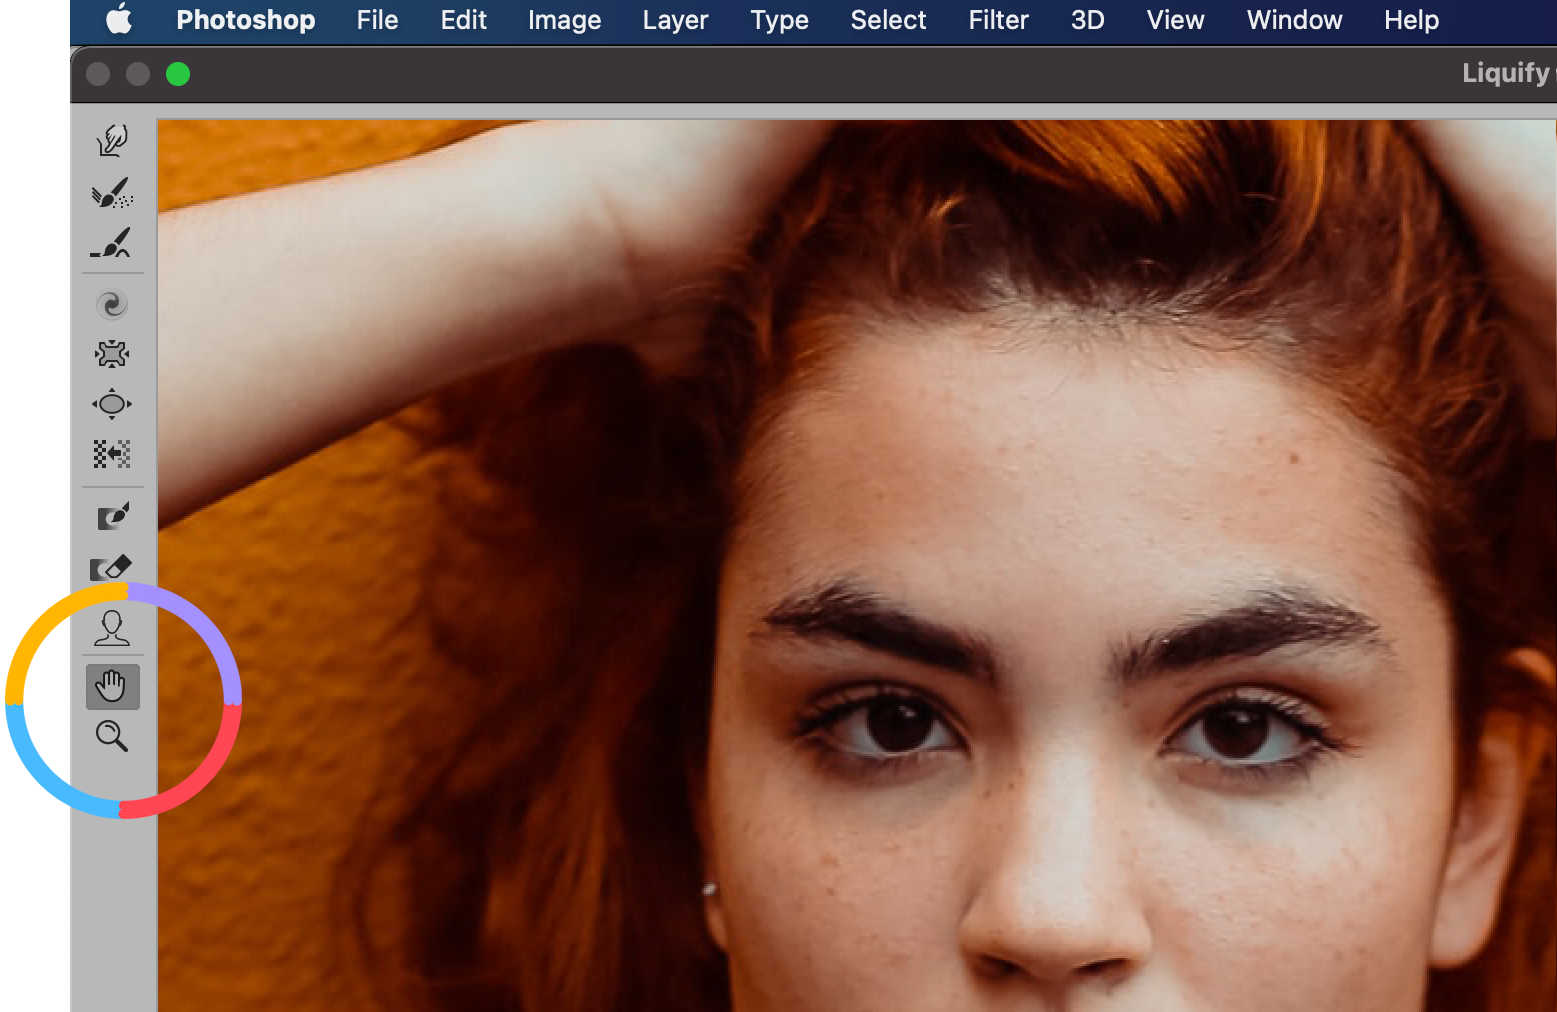
The Liquify Filter window will come up. On the left-hand side of the window, you’ll notice a small icon menu. Choose the Zoom tool to zoom in on the model’s face, and use the Hand tool to recenter the face within the view window.
Step 3: Adjust the smile
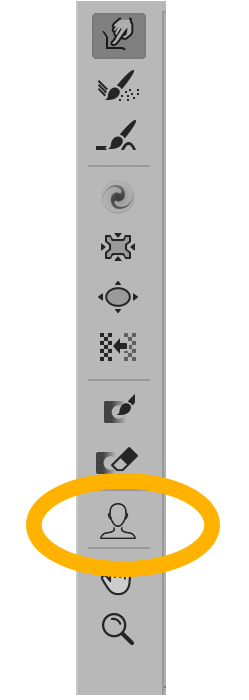
Once you have a clear view of the face, click on the Face Tool (or use the key command shortcut by typing the letter A). Once selected, you’ll notice that small lines appear around the model’s face when you hover over the cheeks, mouth, eyes, and other facial features. You can use these to adjust the individual features of the face.
On the right-hand side of the window, you’ll also see menus for individual features, where you can control the size of different parts of the face. Photoshop even has a smile filter where you can adjust the upward curve of the lips, creating a smile.
Create a smile
To edit the smile in Photoshop, either grab the curved line around the edge of the smile and drag upward, or increase the smile filter using the toggle on the right-hand side of the window. To see the curved arrow, hover your cursor over either edge of the mouth.
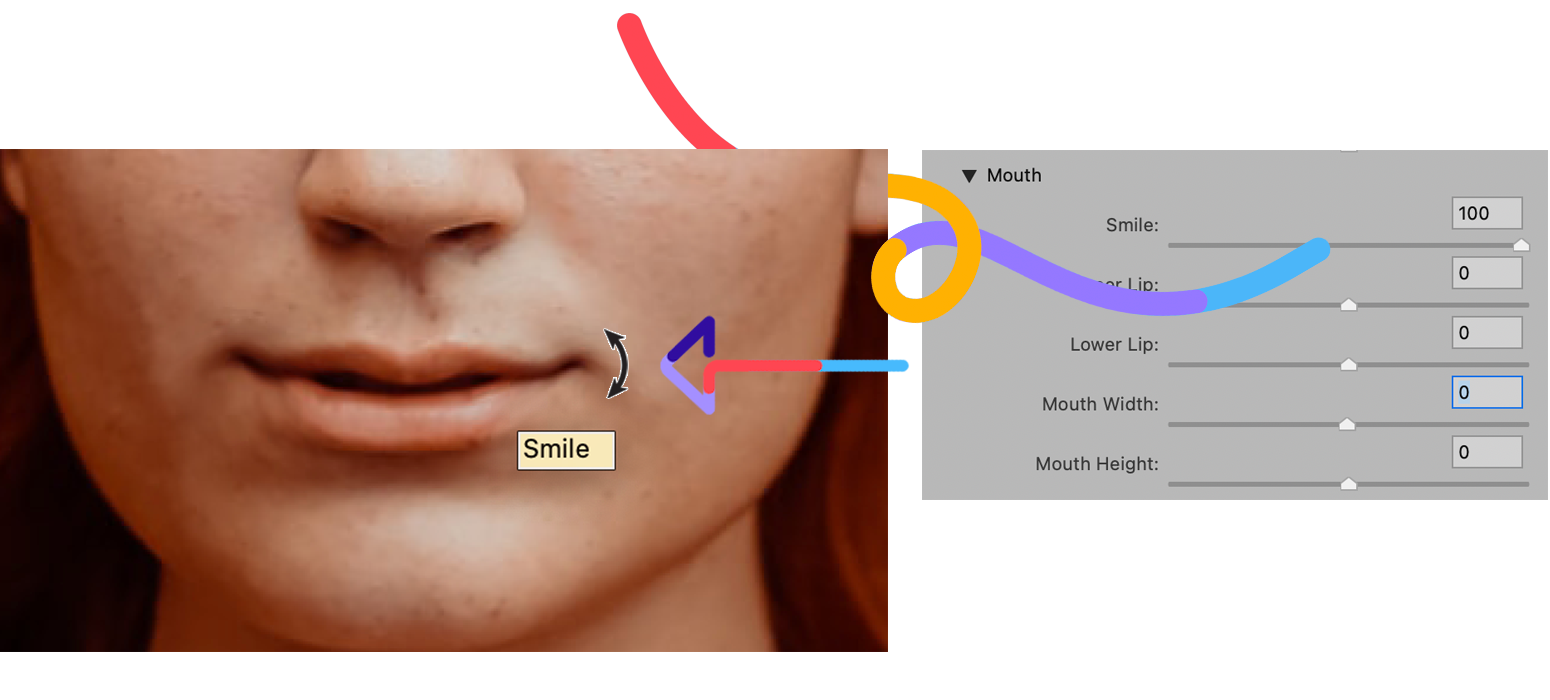
As you can probably figure out, if you want to make someone frown in Photoshop, you would pull the edges of the mouth down instead of up.
Widen the smile
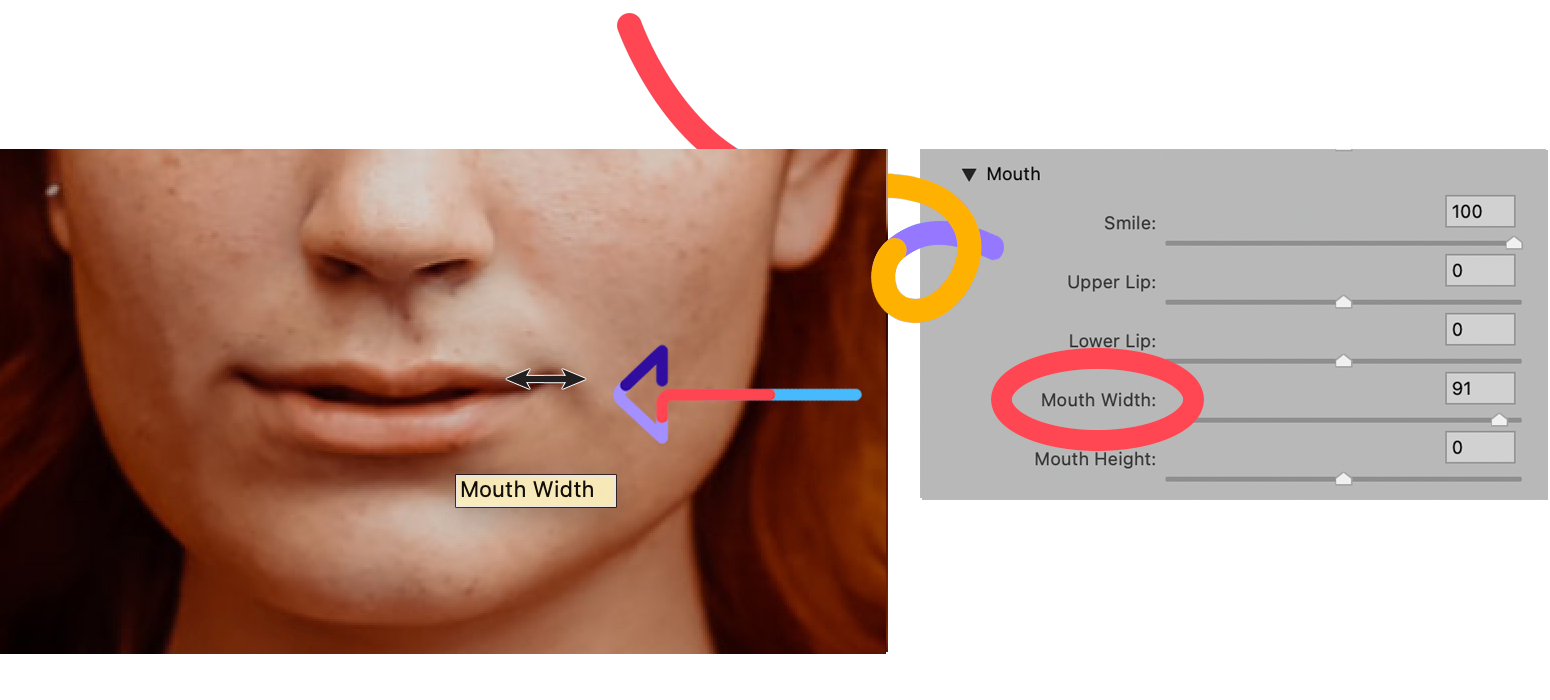
When you smile, your mouth actually widens, so once you have increased the model’s smile, you can widen the mouth by dragging the double-headed arrows that appear when you hover your cursor over the model’s mouth in the image, or by increasing the Mouth Width toggle on the right-hand side.
Change lip height
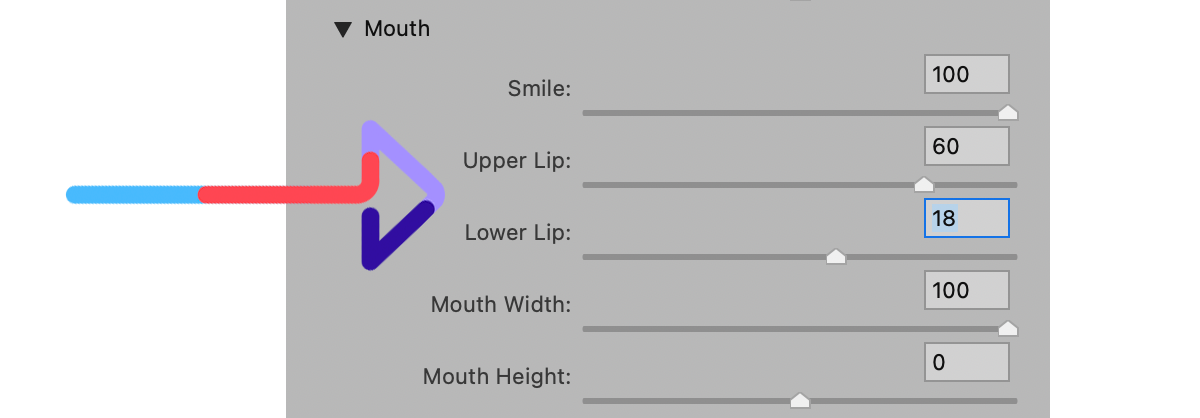
If necessary, you can also increase or decrease the height of the upper and lower lip. Again, you can use your cursor to do this within the image, or use the toggles on the right. With the toggles, moving the toggle to the right pulls the lip up, and moving it to the left pulls the lip down, so on the upper lip pulling the lip up by moving the toggle to the right will increase its height, but pulling the lower lip up by moving the toggle to the right will decrease its height (and vice versa for moving the toggle to the left).
Adjust the insides of the lip edges
Finally, you need to pull on sections of the lips to adjust the entire smile and not just the edges. Grab your Forward Warp Tool on the left-hand menu (or use the key command shortcut by typing the letter W). Adjust the size of the brush so that its diameter is about 50% wider than the width of the model’s lips, and set the pressure to 50.

The Forward Warp Tool can be used to warp certain areas of your image in the specific direction of your choosing by pushing on those areas with the brush. You will want to use this tool with care so that your resulting image doesn’t look distorted.
Using the Forward Warp Tool, pull up the inside edges of the upper lip just enough so that it looks like the entire upper lip is smiling, not just the outside edges.
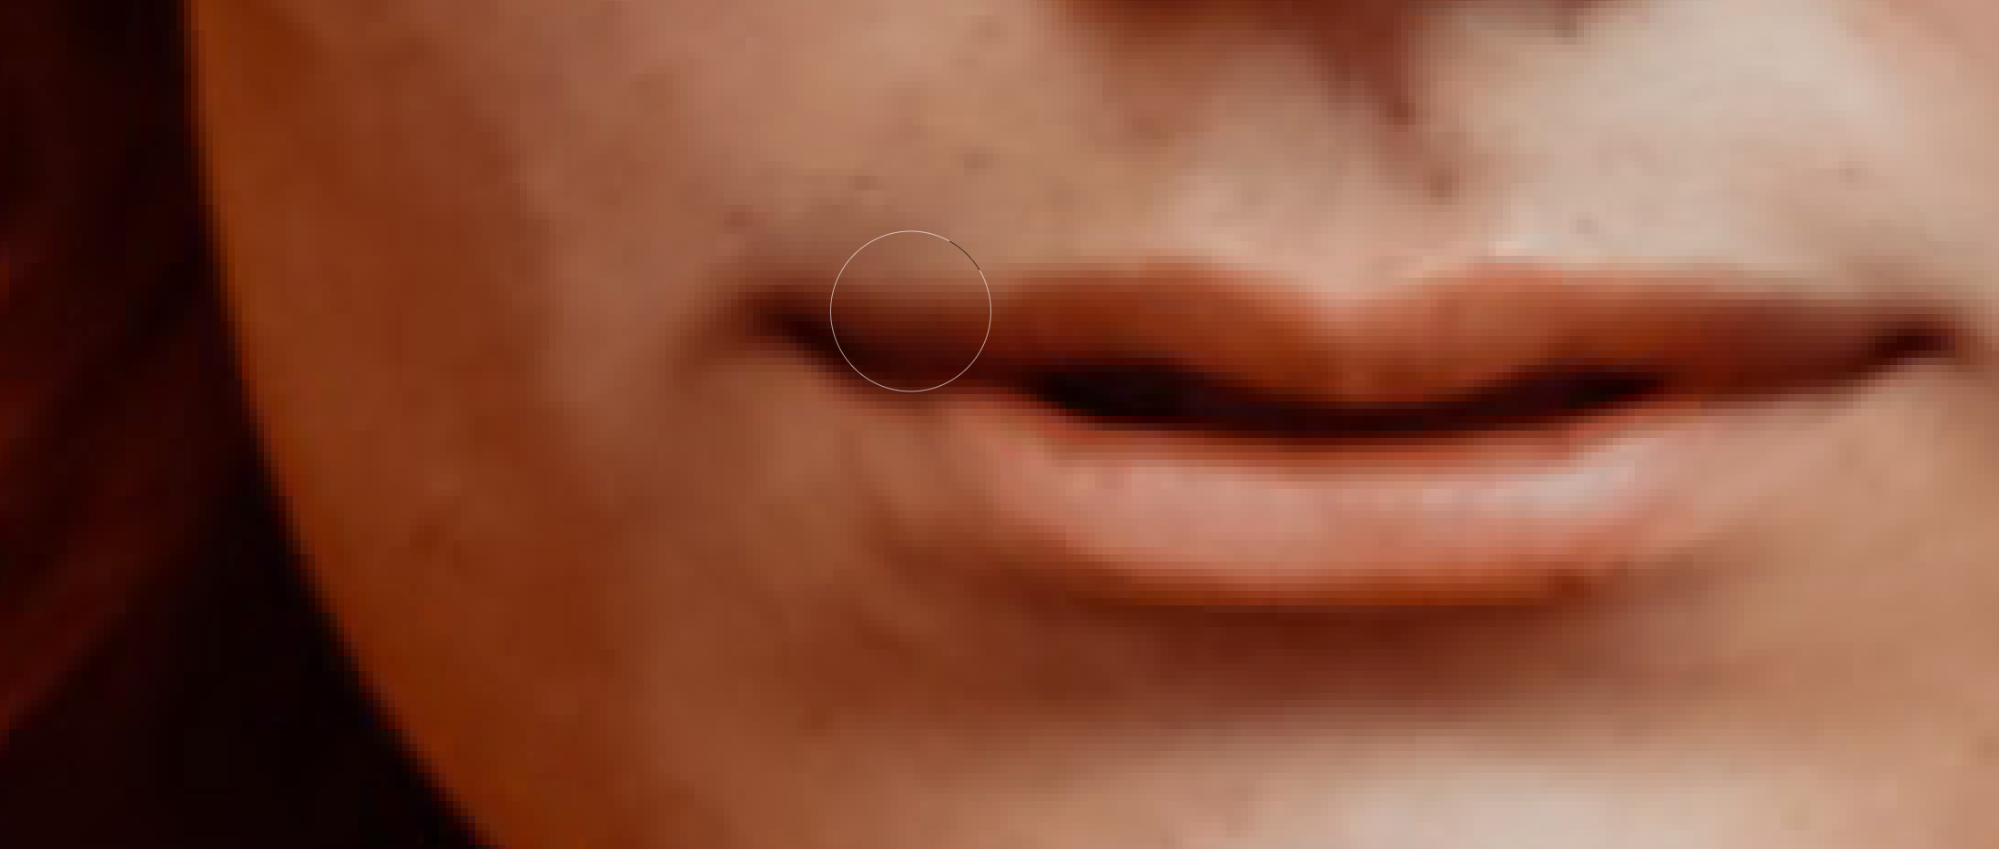
Repeat the process just inside the edges of the lower lip, making the lower lip extend out to the sides of the smile.
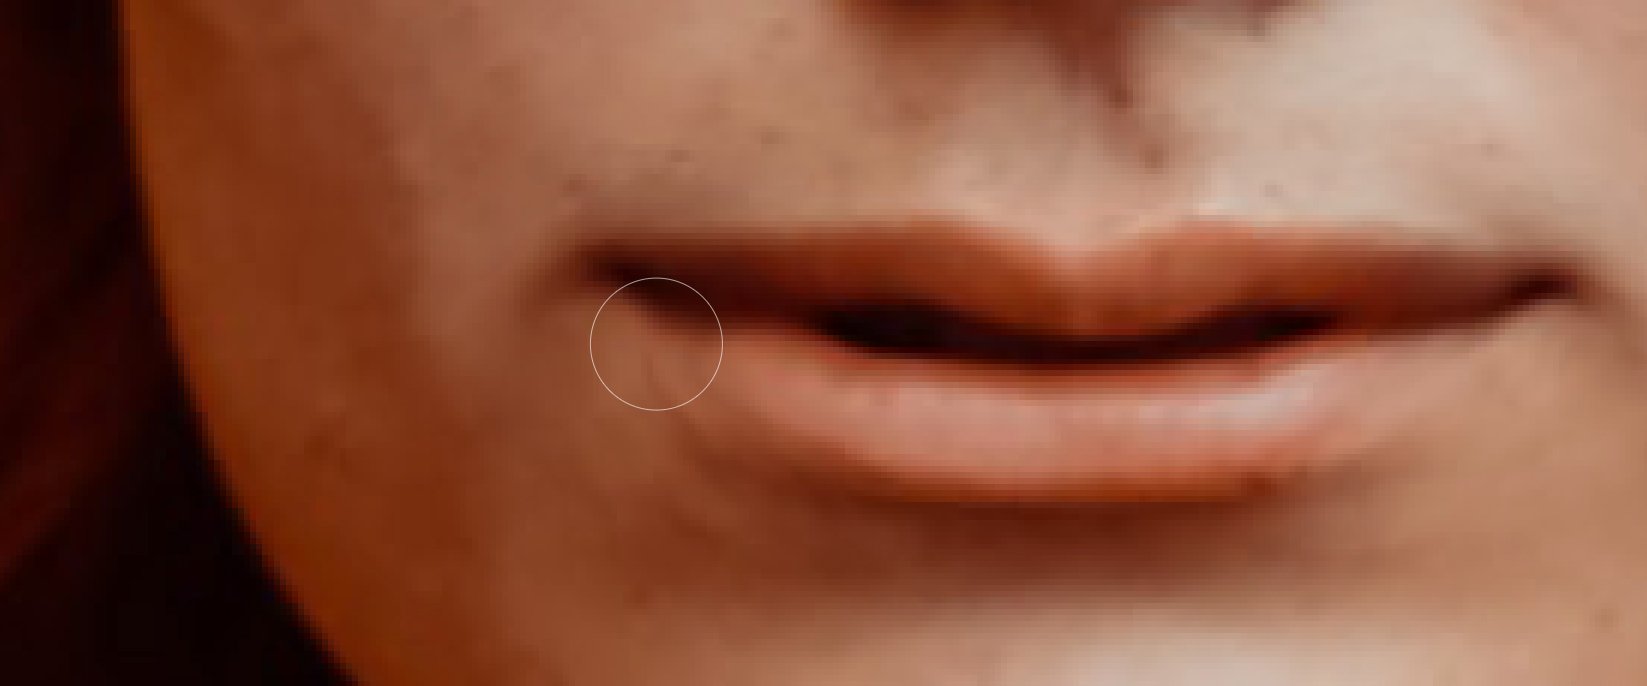
You can also use this tool to pull the edges of the smile a little wider if you don’t think Photoshop’s smile app is enough.
Step 4: Adjust other features
A smile isn’t just on the mouth. It affects the entire face: chin, nose, cheeks, and eyes.
Jawline
First, let’s reduce the model’s jawline to mimic the way the jaw moves up when we smile. You can do this using the Face Tool again. On the right-hand side, move the Jawline toggle to the left to decrease the width of the jaw. If you feel confident using the Forward Warp Tool, you can fine-tune the edges of the jaw with this tool as well.

Cheeks
When we smile, our cheeks move up. There is no toggle for the cheeks, but you can manually manipulate them using the Face Tool. Grab each of the model’s cheeks with this tool and move the cheek upward.
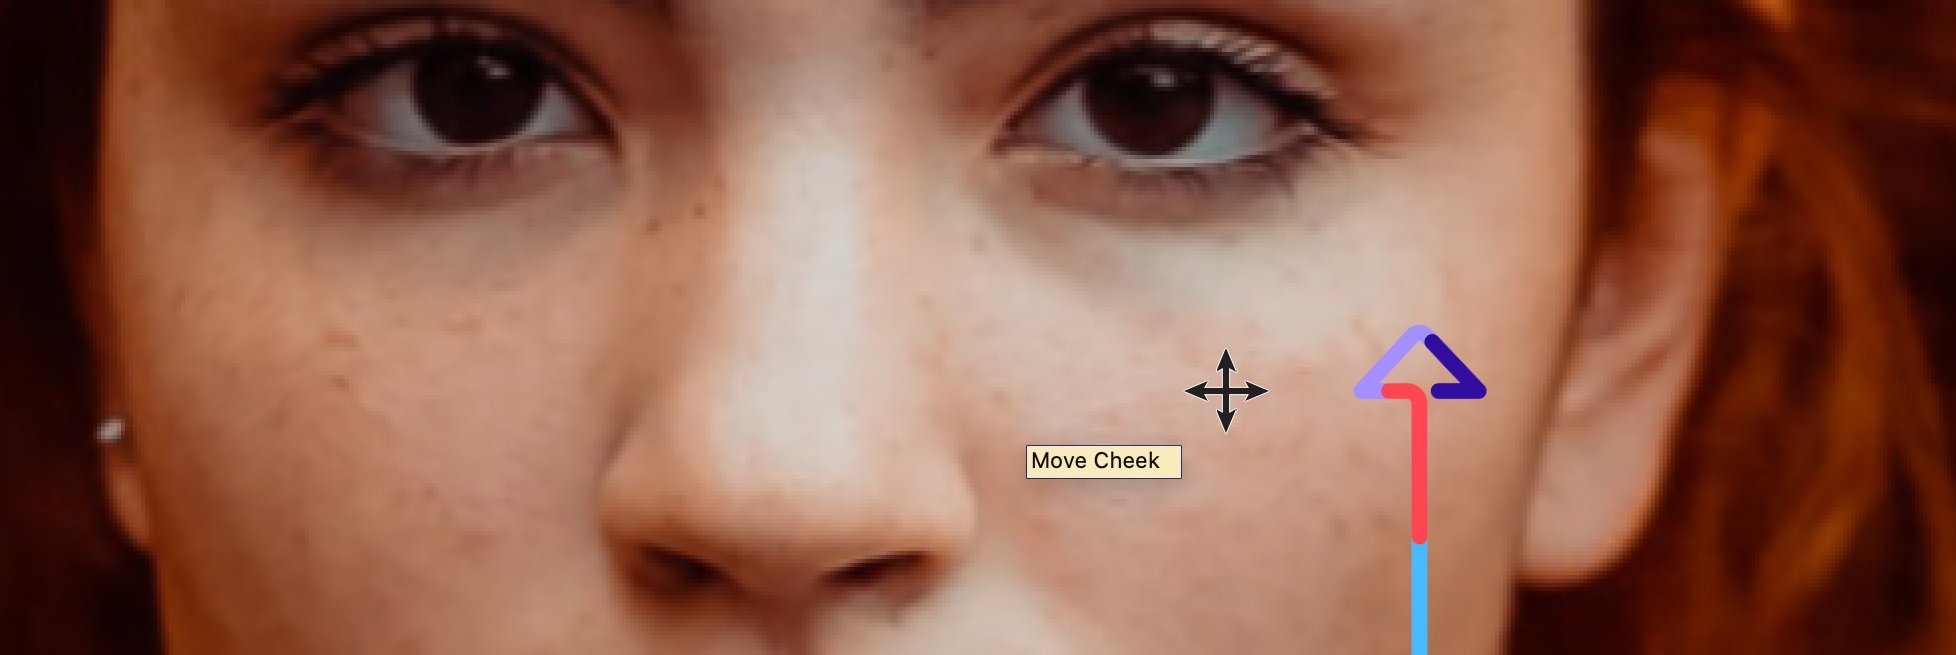
You’ll notice that when you do so, the eyes get a little shorter. That’s fine, we do squint a little when we smile, which moves us into the next facial feature.
Eyes
On the right-hand side, you will see toggles for eyes. It’s best to use the toggles when adjusting the eyes so that you can ensure you adjust each one equally. Reduce the height of each eye just a little (here, I set the eye height to -38). You can also use the Forward Warp Tool to gently push the lower lid of each eye upward, mimicking a smiling eye.

If you’re concerned the eyes look too small now, you can widen the width of the eyes using the toggles on the right. Just be aware that this widens the eyes uniformly, so you may have to adjust the width between the eyes to compensate.
Nose
When we smile, the bottom of our nose widens slightly and our nostrils might flare. You can mimic this effect by slightly increasing the width of the nose using the toggles on the right or by using your cursor on the image itself.

Forehead
Some people’s entire face seems to move up when they smile. You can mimic this effect by shortening the forehead, using the toggles on the right.
Step 5: Add the details
If you are mostly satisfied with how your face looks, click OK to exit the Liquify filter.
We have a few more details to add to make this image look its best. In our example image, this model’s lips are slightly parted, but if this were a real smile her lips would be together. We can use the Healing Brush Tool and/or the Clone Stamp Tool to paint the space between her lips, making it look as if her lips are touching.
Reference: Introduction to Tools article to find out more how the Healing Brush Tool and Clone Stamp Tool work.
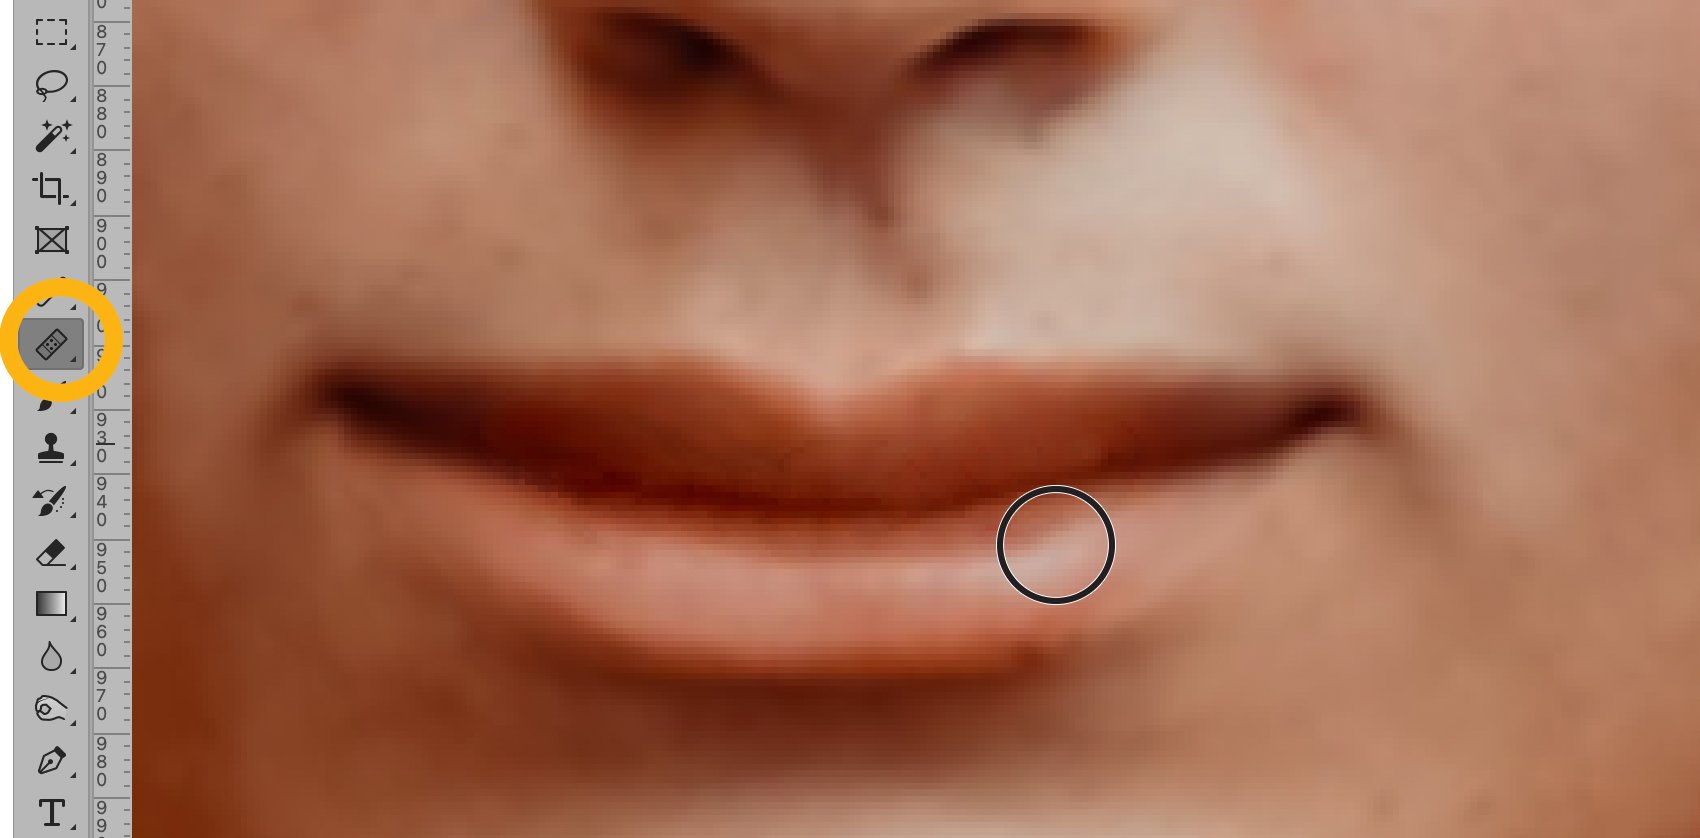
If there are any areas that look too distorted or sharp from using the Forward Warp Tool, use the Healing Brush Tool to clean up those areas as well.
Next, we’ll want to add dimples. Remember, when we smile our face comes alive with dimples, laugh lines, and other interesting features. We’ll want to add these things in moderation, but a little definition on our model’s face will make the smile more believable.
Create a new Layer and call it Dimples.
Set the layer’s Blending Mode to Multiply, and set the Opacity to 50%.
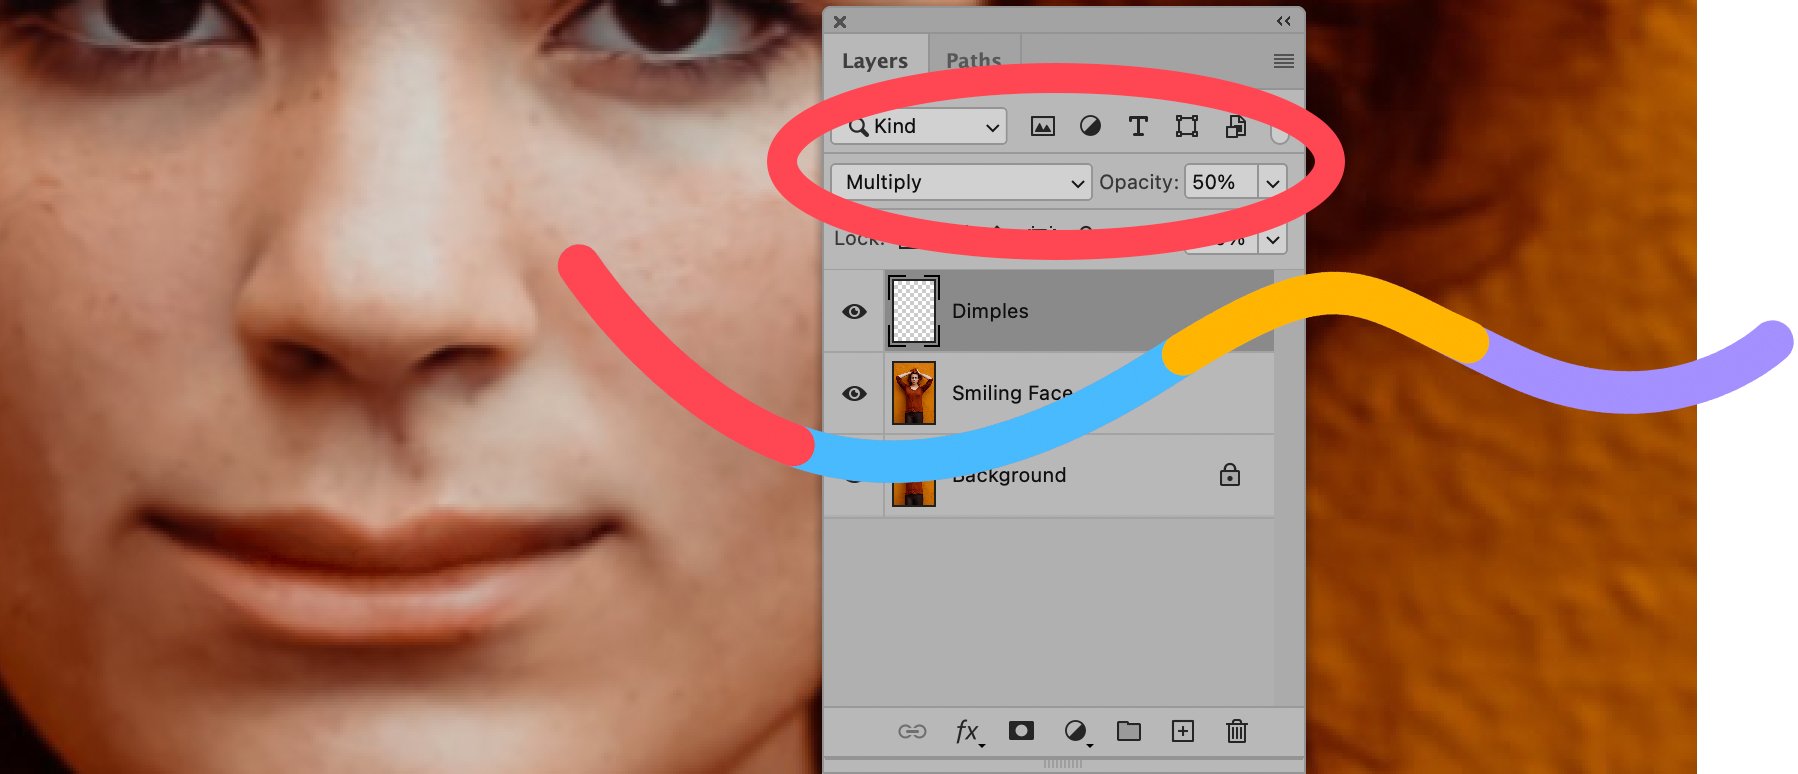
With the Eyedropper Tool, select a part of the model’s face that is in shadow.
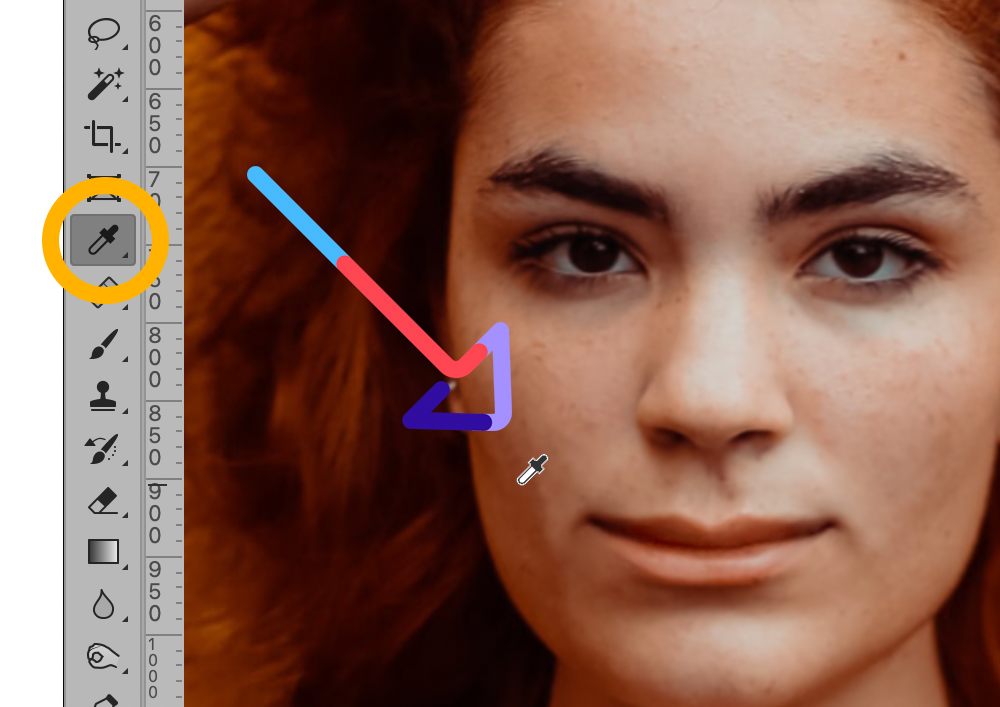
Once the color is selected and set as your Foreground color, select the Brush Tool. In the tool’s preferences, adjust the width so that the brush’s diameter is about half that of the height of the model’s lower lip. Set the opacity to 10%, and set the brush’s Blending Mode to Multiply.
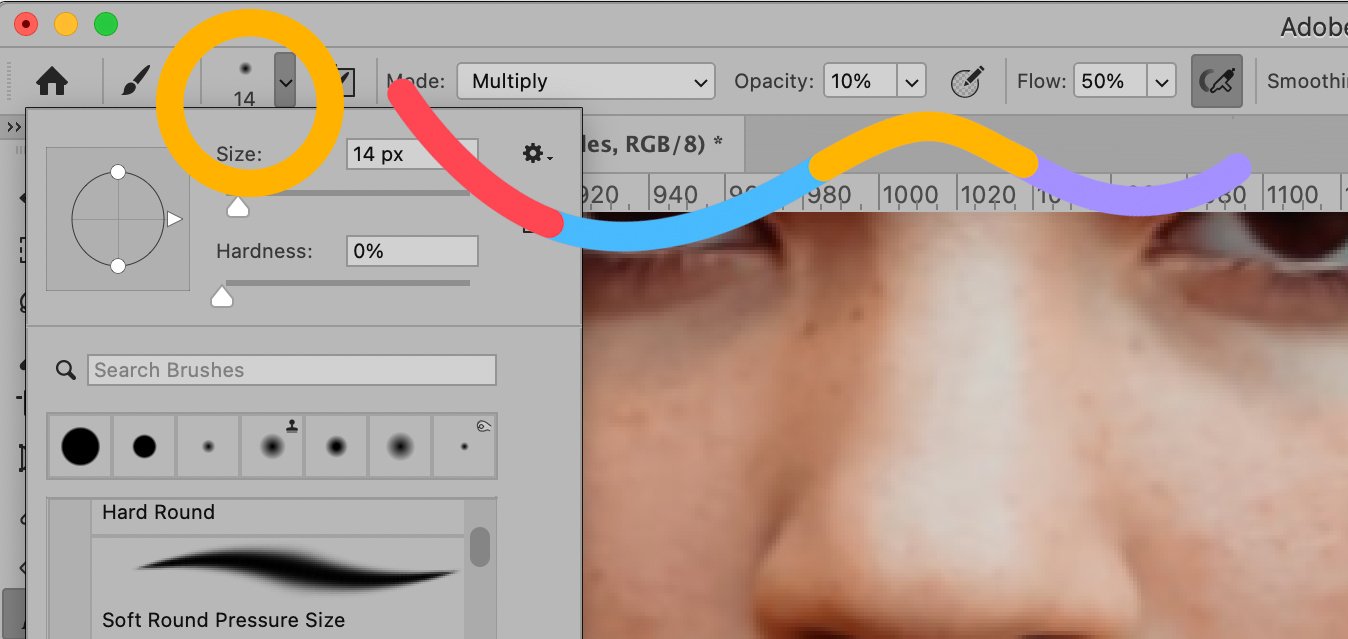
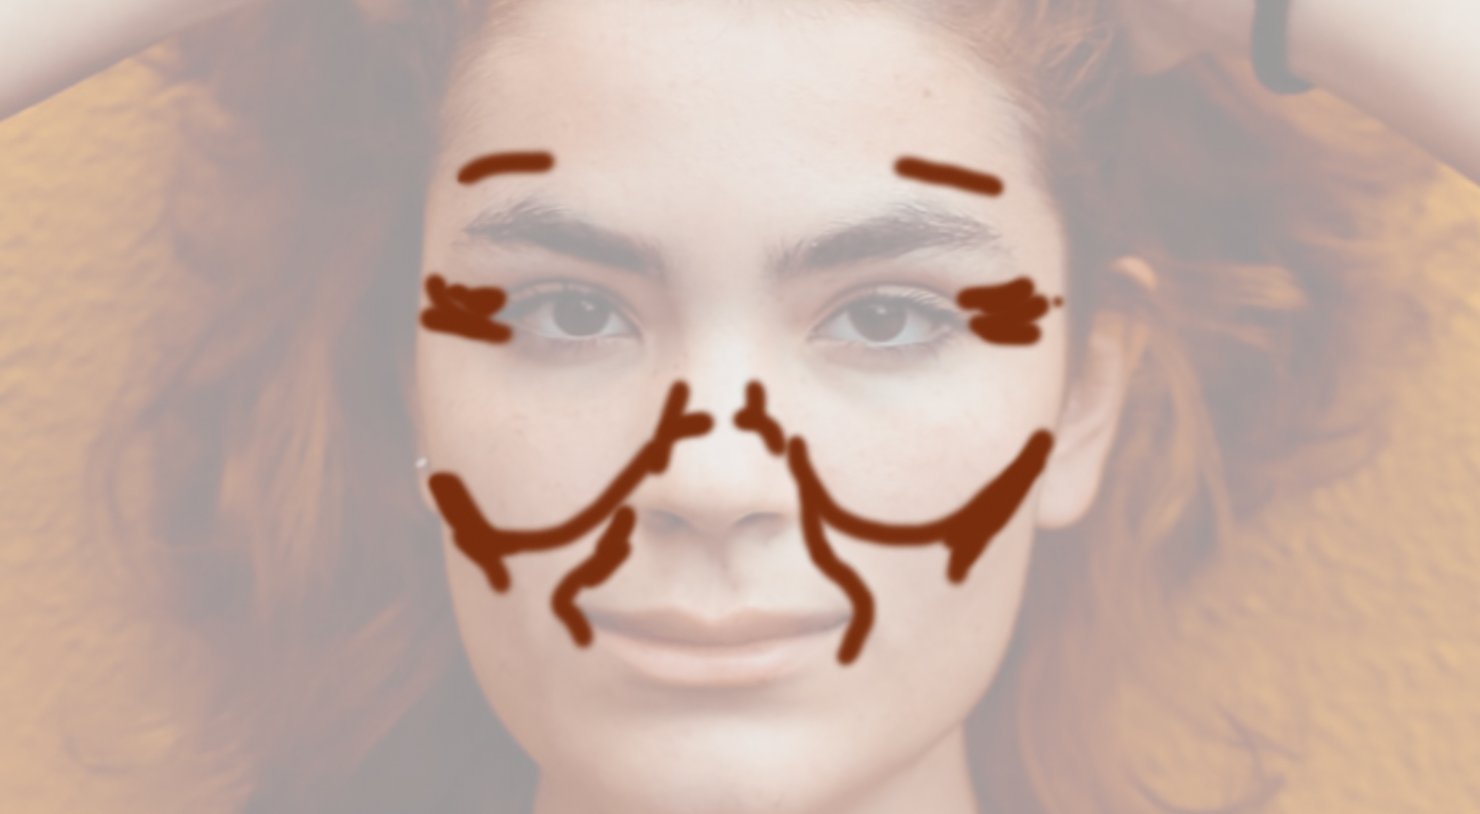
Within the Dimples layer, gently paint smile lines around the model’s mouth and add definition under the cheek bones and to the sides of the eyes. As you work, make sure that the lines are not obvious, but also make sure they don’t look like dirt.
The image below shows where I painted dimples and laugh lines in the example image, with contrast enhanced.
If the Dimples look too gray compared to the model’s skin, select the Dimples layer and choose Image > Adjustments > Hue/Saturation from the dropdown menu at the top of the application window. Then, adjust the Saturation toggle to the right until the shadows look more natural in color.
If the dimples look too defined, choose Filter > Blur > Gaussian Blur from the dropdown menu at the top of the application window and set the Radius to anywhere from 1 to 5 pixels, depending on the size of your image.
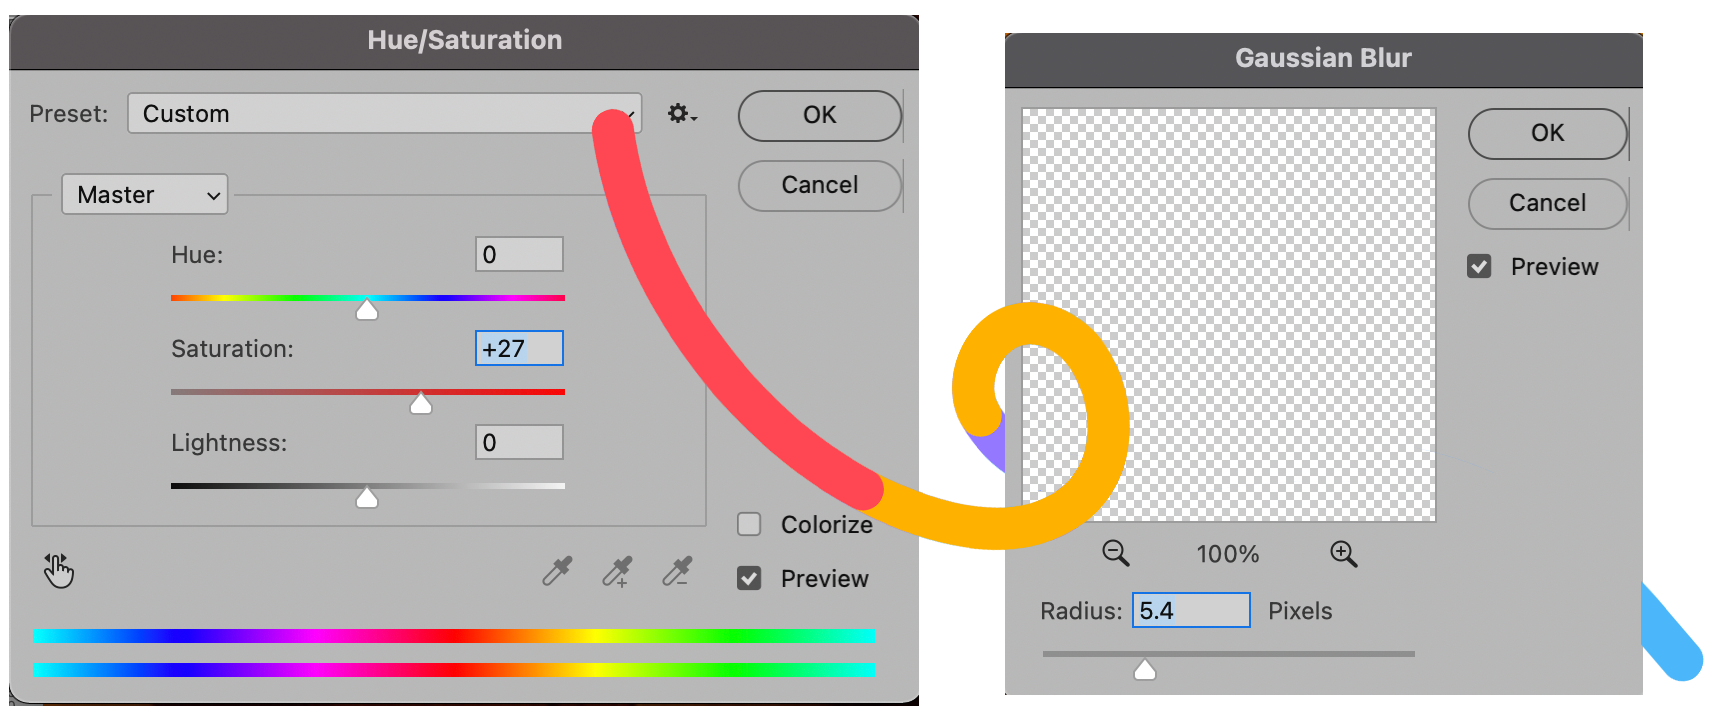
You can then fine-tune the opacity of your Dimples layer to make the laugh lines more or less noticeable.
And there you have it! A smiling photo. If you did everything correctly, you still have the original image in a layer under your new, adjusted layers. You can compare your original image to your modified image to see the difference you made.

How to fix a crooked smile
If your model is already smiling, but that smile is crooked and you wish to straighten it out, you can use the Forward Warp Tool in the Liquify filter to adjust the edges of the smile so that it is uniform throughout. See the second part of Step 3 in this tutorial for detailed instructions on using the Forward Warp Tool.
How to add teeth to a smile
We don’t recommend trying to add teeth to a smile, because there are only two ways to do it and both are tedious and will likely produce subpar results. However, if you are determined to add teeth to a smiling model, you can attempt one of the following methods:
- Using your Brush tool, set your foreground color to white or off-white and gently paint in areas of teeth that would be visible in your image.
- Find an image of a grin (smile with teeth showing) from another photo and swap just the smile out using the Face Swap method outlined here.
Moving forward with Photoshop
Photoshop is an incredibly powerful tool, and you can do so many things with it. But it also has a learning curve, and it takes time to perfect every little detail. No time to fumble with Photoshop yourself? Outsource your edits to your virtual photo-editing studio.
[cta text=”Find out how it works” button=”Learn more” link=”https://clippingpathindia.com/pages/how-it-works”]

